C116 Case + Raspi 2 + Keyrah + VICE = Retromachine
Do you want to play some retro games from the 8-Bit era? Yes? Well, you could use an emulator on your modern computer. But is it really the same? Maybe you have some old hardware? That´s cool, but it requires some effort and space, especially if you want to use various classic computers. Thus, if you are not a collector of old hardware but playing ancient computer games is your cup of tea, you may like what you read next. We took the case of a beautiful, tiny Commodore C116 computer with a damaged board and put a Raspberry Pi 2 and a Keyrah 2 interface in it. With the VICE emulator installed, we can now play all our favorite games and use applications for C16/C116/Plus4 (of course), C64, C128, VIC20, PET, and CBM-II in style - and all this on a device with the footprint of a paperback.
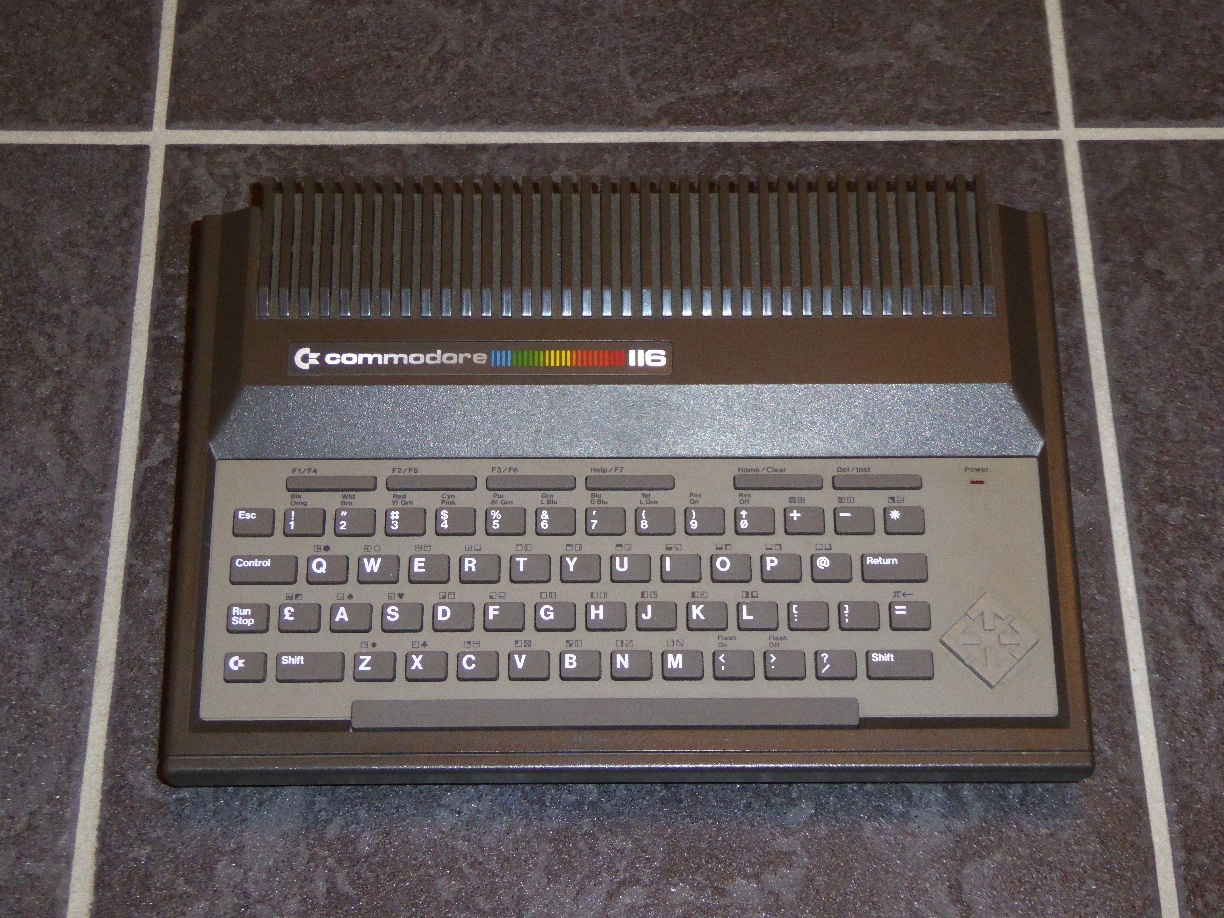
Of course, to use the Keyrah keyboard interface in an old Commodore computer case is not a new idea. In fact, the manual hints at the possibility to implant the Keyrah interface in a C116 case. However, since the C116 case is very small and this is all the manual tells us, we have tried this on our own. To our knowing, no one has written about this in the web so far. We think this is due to the fact that the C116 was not exactly a popular machine and not even known in many countries. We like to show you how everything fits into the case and how the connectors for power, monitor, and joysticks are easily accessible from the rear side.
Required parts
C116 (of course one with a damaged board)
Raspberry Pi 2 (a Raspberry Pi 1 would also be acceptable but is too slow for some C16 games)
Keyrah 2 USB Interface (e.g. available at Individual Computers or Vesalia)
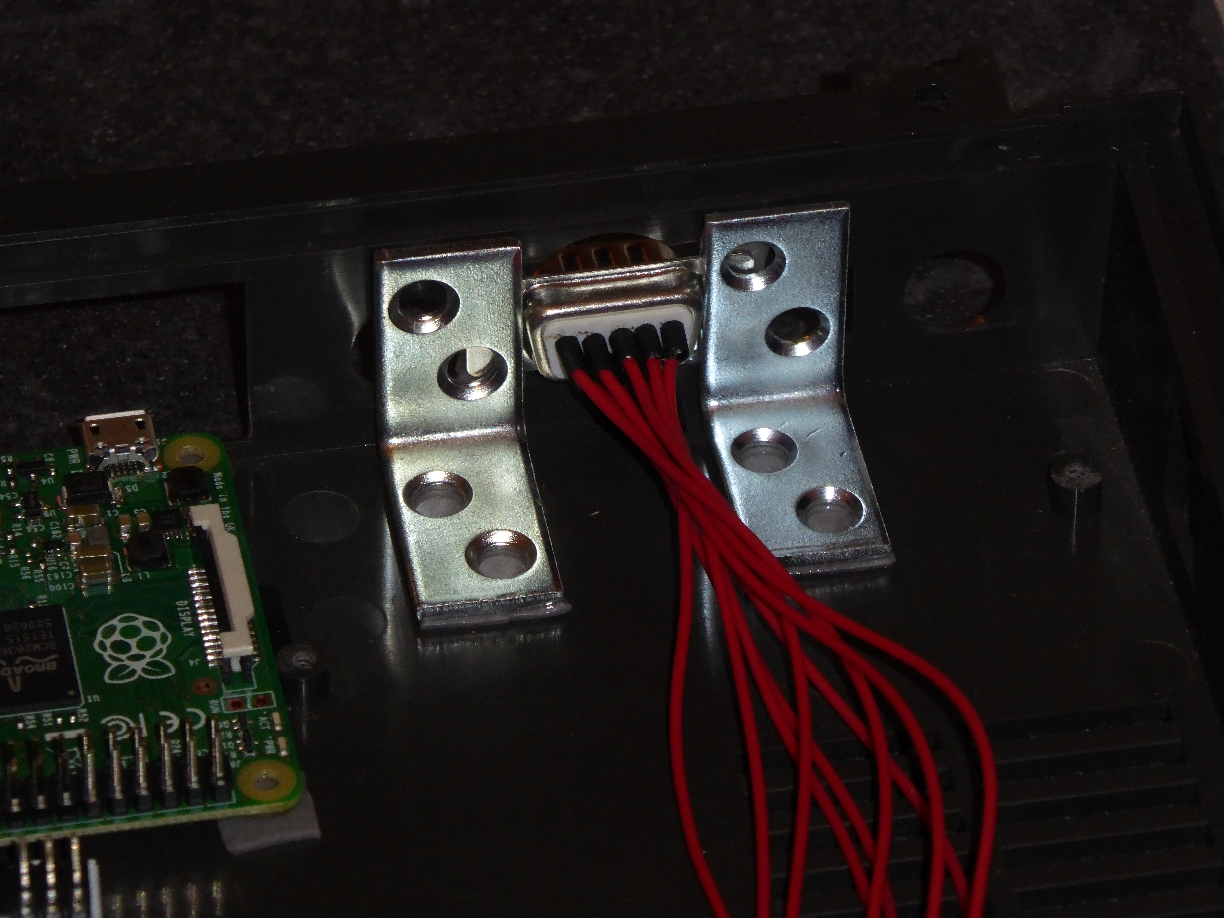
2 * 9-pole D-sub male connector (joysticks)
2 * 9-pole D-sub female connector (joysticks)
USB male connector (internal connection to Raspberry Pi)
FFP/FPC connector with 18 pins to connect the keyboard foil cable of the C116 with the Keyrah adapter (e.g. available at TME Germany GmbH)
Self adhesive knobs (to be taped below the Raspberry Pi and the Keyrah interface)
Copper strand
Heat shrink tube
4 metal brackets (to clamp the joystick connectors)
Double-sided duct tape which works for plastics and metals
Assembly
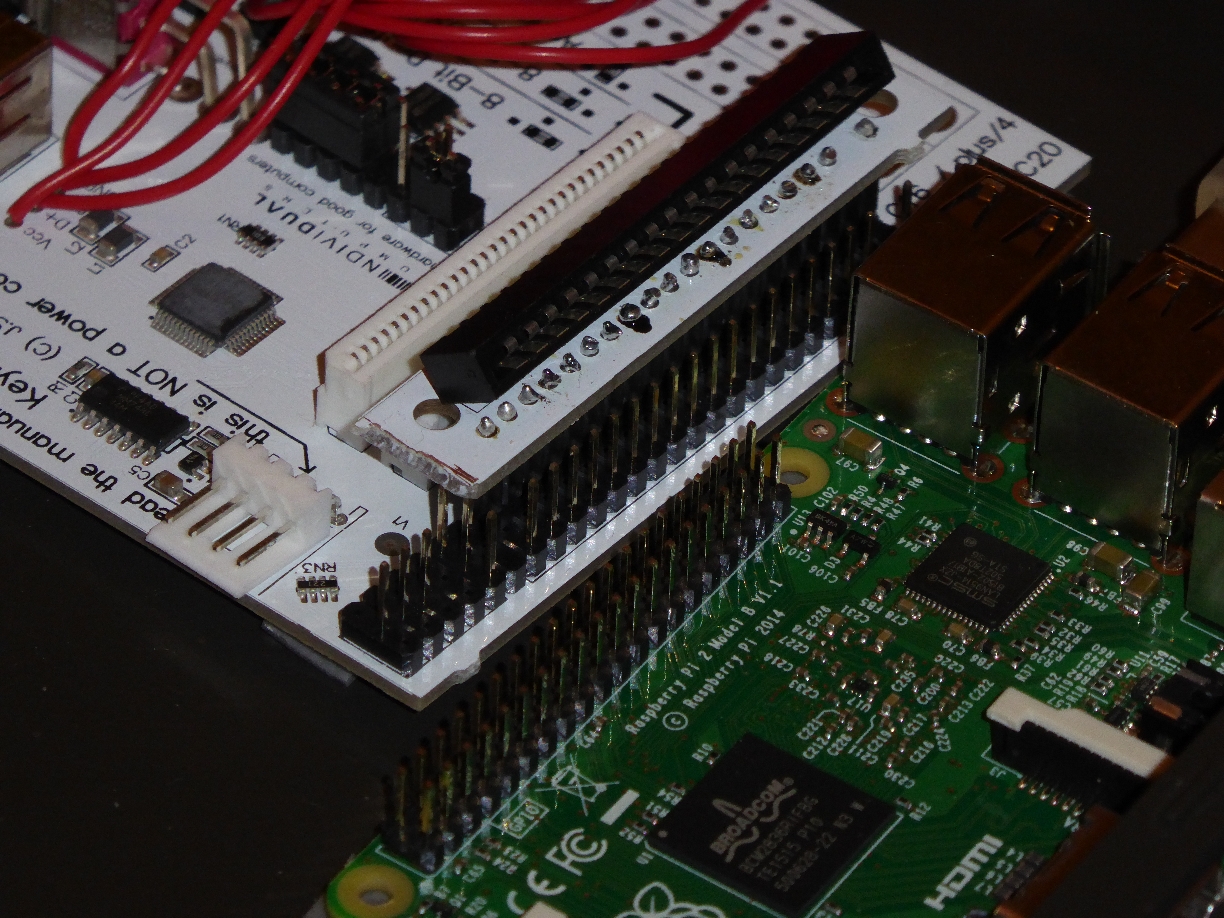
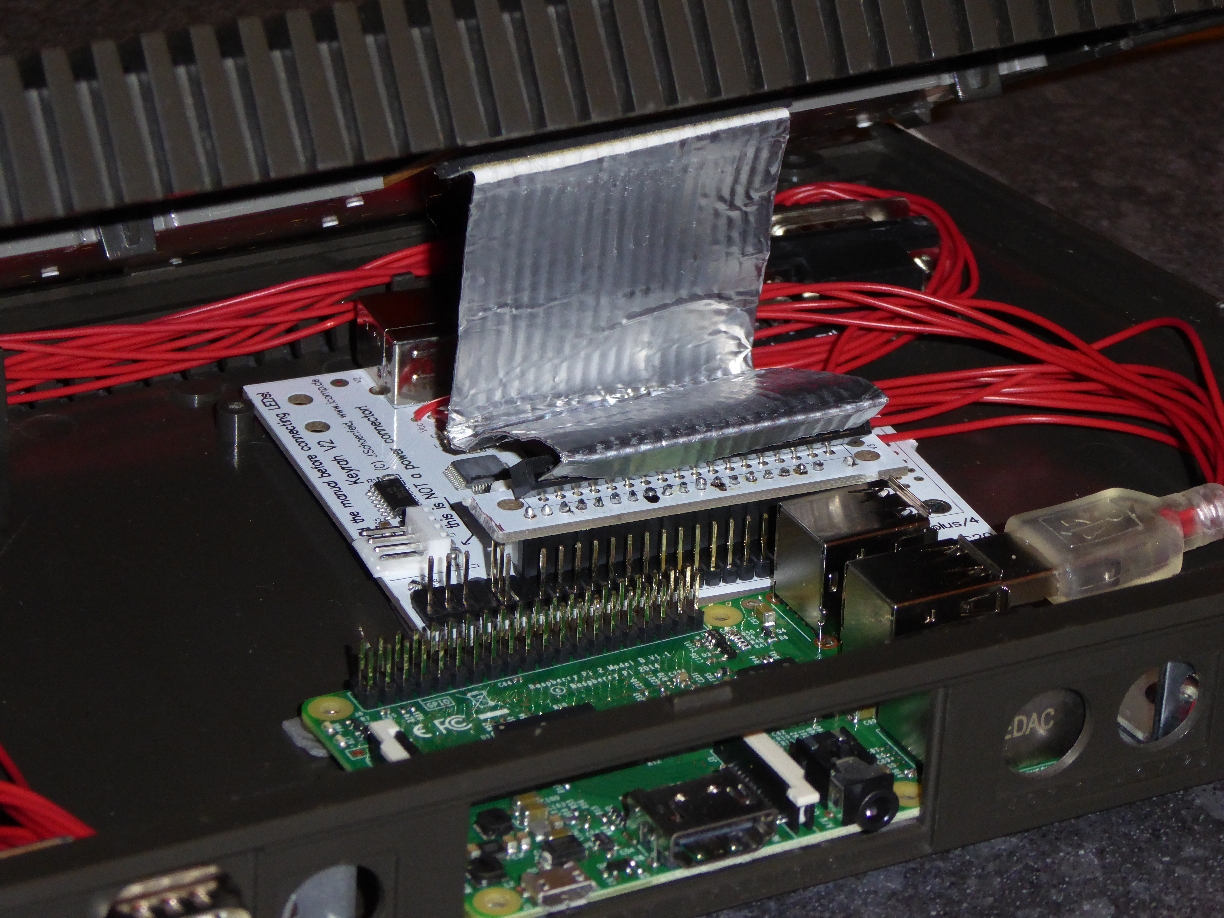
The first step is to remove the old board from the C116. Unscrew the screws, open the case carefully, remove the cooling plate, and unplug the keyboard cable. You need to unscrew some additional screws which hold the board. After that, the board can be removed. Remove also the metal inset which is below. Next is the preparation of the Keyrah interface. Follow the attached instructions. You have to saw the small part off which will be reused as an adapter for the C116 keyboard. Take that small part and turn it in a way that the label "C116/plus4_conn" is on the upper side. Solder the FFP/FPC connector to this side to the 18-pins long soldering strip. Subsequently, the adapter with the soldered FFP/FPC connector must now be soldered to the pins on the Keyrah interface that are labeled with "plus/4". Sounds a bit confusing, however, in the end it shall look like on the pictures below.

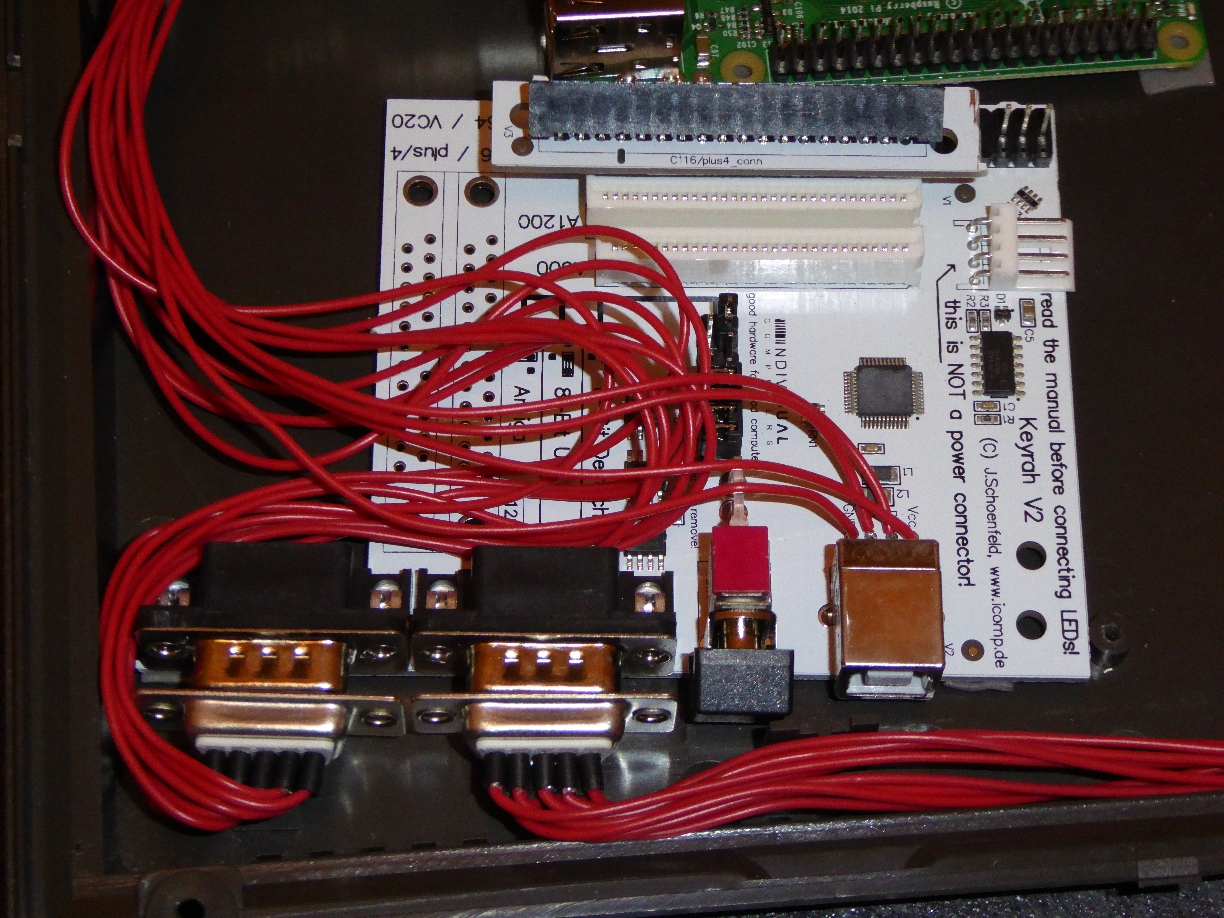
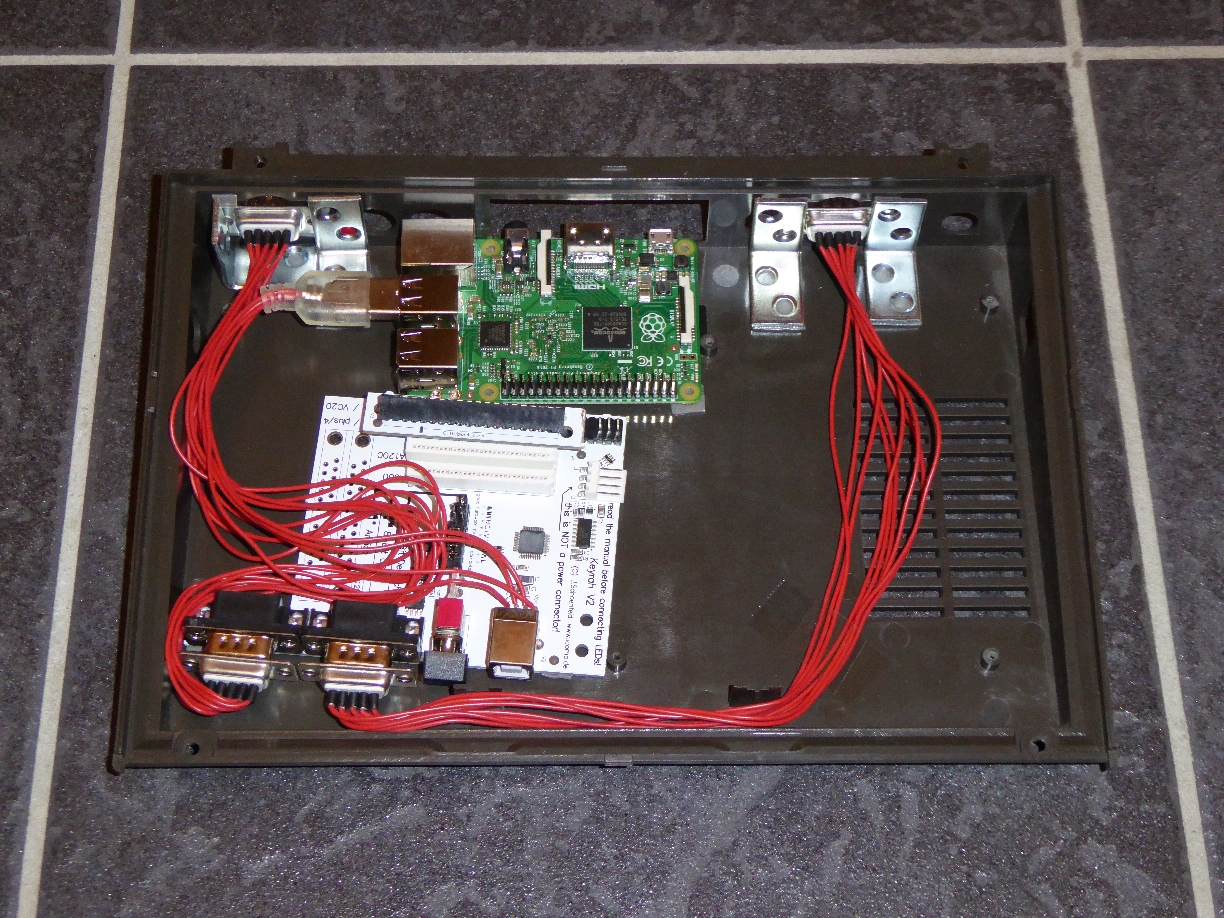
Now it is time to prepare the joystick connectors. Unfortunately, it is impossible to assemble the Keyrah interface so that its joystick ports are directly reachable from the outside. Due to the short and inflexible foil cable of the keyboard, we need to place the interface near the edge of the case, but not at its right side. Thus, it is required to solder extension cables. To this end, take some copper strand, heat shrink tube, and the 9-pole D-sub connectors and make up cables as shown on the left picture below. They should be long enough, so that the original video and serial ports can be used for the joystick connectors (cf. left picture below).
After that, solder the USB cable. Because of the position of the Keyrah interface within the case, you cannot use an ready-made USB cable. Take four copper strand pieces and use them to connect the USB male connector with the corresponding soldering points on the interface. Optionally, you can first solder a multi-pin connector with 4 pins to the interface. This makes it a bit easier to solder the cables.
The last step is to attach everyting to the case with strong double-sided duct tape. To this end, clean the bottom side of the case so that the duct tape sticks better. Using tape has the advantage that the case is not damaged which would be the case if you screwed the components. Small self adhesive knobs are taped below the Raspberry Pi and the Keyrah interface to prevent the boards from touching the case. The knobs are then taped to the C116 case. The Keyrah interface must be turned slightly because of a plastic clamp from the case. Make sure that everything is arranged in a way that the keyboard cable fits into the FFP/FPC connector before you close the case (cf. right picture below). As a lot of force may act upon the joystick ports, we decided to add a support to them. For this, we used metal brackets to clamp the ports (cf. middle picture below). With this, the construction should be stable enough.
Emulator software
Now everything is assembled. It is time for the software:
Prepare an SD card
- Prepare an SD card with a Linux OS, i. e. NOOBS. You may download it from https://www.raspberrypi.org/downloads/noobs/.
- Download the VICE emulator within a ZIP file as detailed in http://piplay.org/forum/discussion/382/how-to-installrun-c64-emulator-vice-on-your-pimame/p1.
- Mount the SD card within a Linux PC or your Raspberry Pi 2. Copy the ZIP file from (2) into the file system on the SD card. Unpack the ZIP file with the VICE emulator.
- Create at least one directory for your image files you would like to execute on the emulated C116. For details on the accepted formats T64, G64, P64, D64, X64, D71, D80, D81, D82, P00, CRT see http://vice-emu.sourceforge.net/vice_15.html. Copy the image files in the newly created directories.
- Unmount the SD card file system.
Install the VICE emulator
- Attach a USB keyboard to your Raspberry Pi 2.
- Boot your Raspberry Pi 2 with the SD card installed. Upon first boot, the default Login is "pi", the default password is "raspberry". You are in a Linux shell, not in a graphical user interface.
- Install the VICE emulator as detailed in http://piplay.org/forum/discussion/382/how-to-installrun-c64-emulator-vice-on-your-pimame/p1.
- Make the desired changes in the Raspberry Pi configuration (raspi-config), i. e. change the keyboard layout and the language.
- Start the C16/C116/plus4 emulator by typing sudo xplus4 (or sudo x64, sudo xpet, sudo xvic, sudo x128 or sudo xcbm2 for the other Commodore 8bit machines emulated by VICE).
Configure the VICE emulator
- Within the C16/C116/plus4 emulator, you need to adapt the keyboard layout to the C116's keyboard. The default layout uses the F12 key for entering the menu. F12 is not available on the C116 keyboard. This is why we need the external keyboard for the configuration. We use the F7/Help key on the C116 keyboard for entering the menu.
- Make all other changes to the default configuration (input, sound, ...). Do not forget to save the configuration. The configuration works the same in all VICE emulators.
Comments
1Dion
Excellent retro project! Never seen this been done with a C116 (not even sure they were sold in the Netherlands back then). You might want to take a look at the Combian 64 project, which is like a stripped-down version of Raspbian + VICE. Boots in 5 seconds without showing any boot messages, so it's like you're starting up the original machine.
Posted: 2017-09-05, 00:56:37
Previous comments | Next comments